Combining delayed and immediate implant placement techniques to restore smiles
Dr Viraj Patel presents a case requiring different surgical techniques and bone augmentation to deliver a stunning outcome in a timely manner.
Introduction
There are several clinical techniques available to the modern implant dentist. Immediate protocols have grown in popularity and now offer a safe and effective solution in many situations, affording faster treatment times and enhanced aesthetic outcomes. Where required, bone grafting with immediate implant placement delivers excellent results. In particular, socket grafting can reduce the amount of horizontal bone loss and enhance soft tissue stability.[i]
It is also possible to combine techniques, utilising both immediate and delayed placement in the same case. There are even situations that require the placement of two adjacent implants. In this scenario, it is crucial to have sufficient interproximal space to reduce bone loss and help achieve good aesthetics. The gap must be large enough for two standard diameter implants with ideally 3mm between them [ii] [iii] and a safety zone of 1.5mm between the implants and the neighbouring teeth. That means a minimum gap of approximately 14mm is required to safely and effectively place two implants in adjacent sites – no matter what placement protocol is selected.
The following case demonstrates the placement of two adjacent implants, each requiring a different surgical approach.
Presentation
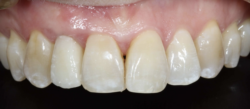
A 58-year-old female patient presented looking to improve the aesthetics and function of her dentition. During a consultation with another clinician, she had been offered conventional implant treatment involving the removal of the UL4 – which had root-filled a retained root – and delayed implant placement. The patient was hesitant to proceed in this way due to the predicted treatment time and expense.
Upon presentation, the initial assessment suggested that an immediate implant may be viable for the UL4 site, alongside simultaneous implant placement in the already healed UL5 site.
Assessment
A comprehensive clinical assessment was conducted. The patient was generally fit and healthy, was taking no medication, had no allergies and maintained fair oral hygiene. The UL5 site, which had been edentulous for approximately seven years, presented with a substantial depression. This made immediate and simultaneous implant placement even more appropriate for the UL4/5, utilising the bone peaks around the UL4 to create a more favourable UL5 implant position and simultaneous augmentation. Other findings of note were signs of tooth wear on the UL3 and UL6, although these were periodontally sound and completely stable.
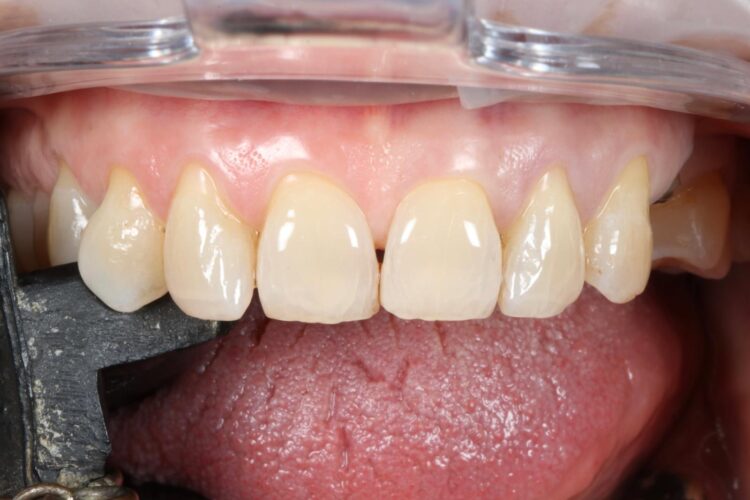
Figure 1: Pre-op intraoral image
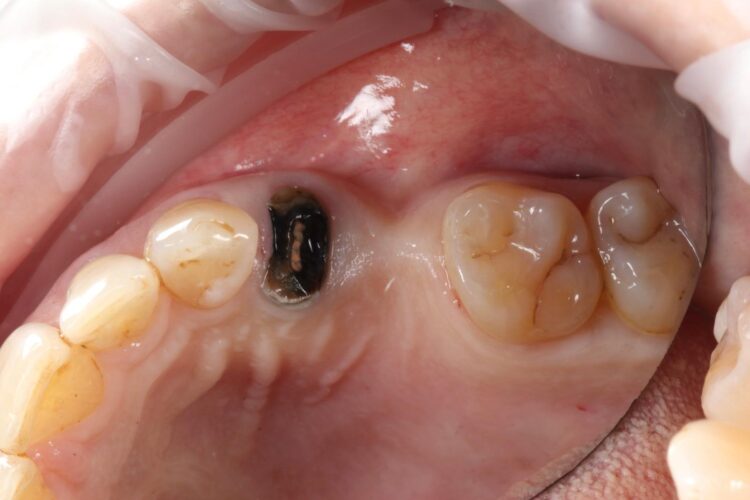
Figure 2: Retained root that has been root filled

Figure 3: CT scan and digital planning for implant placement
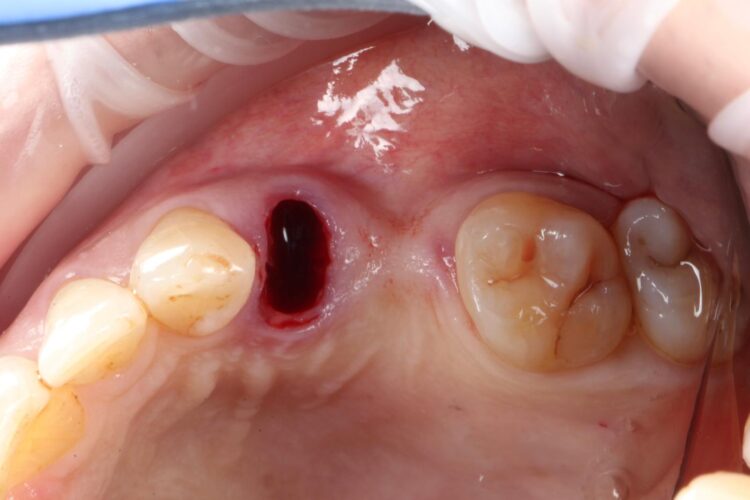
Figure 4: Concavity obvious post extraction
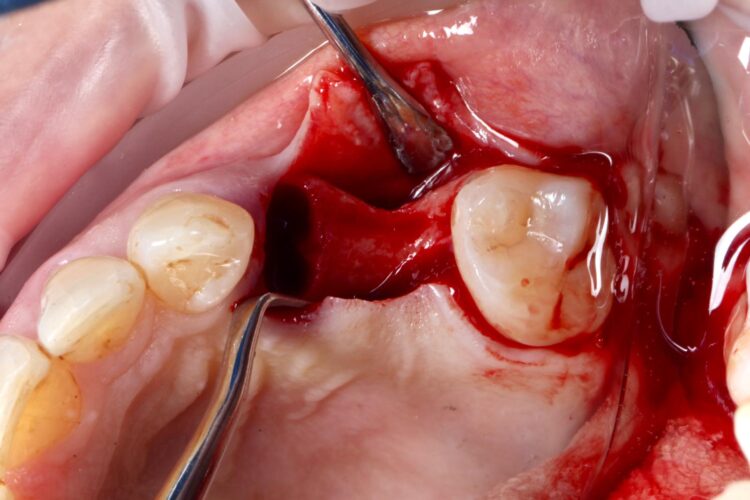
Figure 5: Flap raised with a paracrestal incision
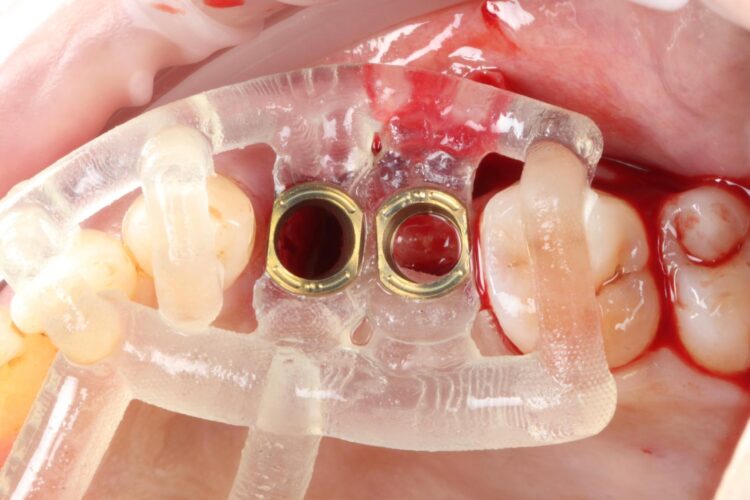
Figure 6: Surgical guide fitted in the mouth
Options discussed
Aside from no treatment and the conventional delayed implant placement approach already offered to the patient, another option would have been a single implant in the UL5 site and restoration with a cantilever bridge. The existing tooth wear suggested potential parafunction, which would have put considerable pressure on one implant and the resulting restoration, the professional recommendation was two implants at the UL4/5 sites.
Treatment planning
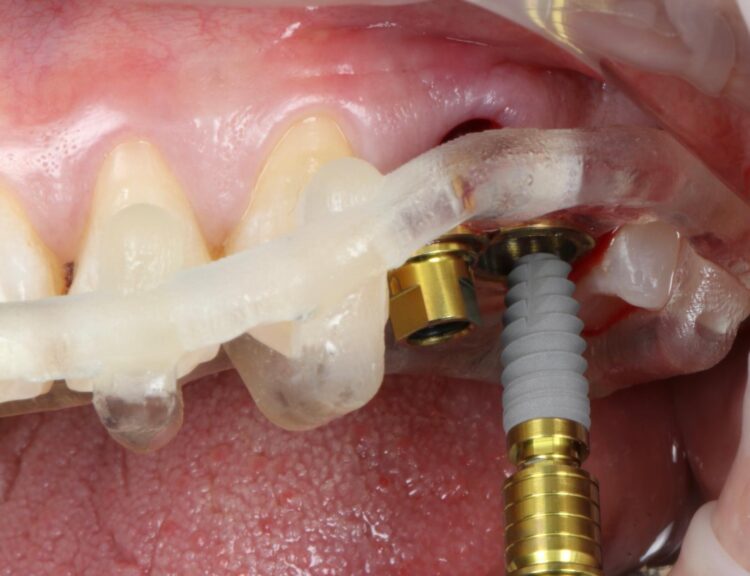
Approximately 15mm of space was available between the distal of the UR3 and mesial of the UR6, which highlighted the importance of absolute accuracy when positioning the implants. Guided surgery was, therefore, indicated as a way of optimising precision.
Treatment was prosthetically-driven and planned using digital software to determine the ideal implant positions and angles. Immediate Provisionalisation with a non functionally loaded custom healing abutment was to be implemented for the UL4 site, to reduce the impact of any parafunction on the implant during healing. Custom healing abutments are a great tool to support soft tissue in relation to the existing adjacent teeth.
A CBCT and intraoral scans were taken and uploaded to the SMOP portal to design the surgical guide as per the clinical plan. These were 3D printed ahead of the surgical appointment.
Treatment provision
The UL4 root was extracted as atraumatically as possible. The roots were thin and spindly, and needed to be split to be removed safely. They were sectioned in a mesial-distal direction to leave the buccal and palatal roots separate, reducing the risk of fracture and preserving the interdental and surrounding bone.
A flap was raised in the UL5 site using a paracrestal incision – vertical incisions were avoided to preserve blood supply to the gingiva, protecting the papilla between the UL6/7 for optimal aesthetic and soft tissue outcomes.
Technically, a flap is not typically needed for many immediate implant cases. However, as the UL5 site needed augmentation and mild atrophy of the ridge was present. The clinician does not advocate flapless procedures for implant placement due to the need to see the underlying ridge and implant following placement.
The surgical guide was then placed in the mouth and the manufacturer’s specific drilling sequence followed, increasing the osteotomy in size incrementally.
The CONELOG® Progressive implant 3.8mm is my go-to for premolar sites. The implant is versatile in its clinical application, suitable for use in healed ridges and fresh sockets, providing good stability for delayed and immediate implant placement protocols. It’s an all-in-one implant for me and I love using it.
Two 3.8mm diameter CONELOG® Progressive-Line implants were placed through the guide, following the plan precisely. The UL4 implant was longer (11mm) to ensure sufficient apical bone was engaged for primary stability, it was also positioned in the palatal root to ensure good engagement with the bone and better bone to implant contact. A sizable jump gap was noted between the implant and the buccal plate of around 5-6mm. From a biological perspective, the jump gap can be left because the ridge would heal to leave a sufficient buccal plate. However, the literature[iv] shows that grafting reduces the amount of bone resorption post implant placement, which was one of the reasons that augmentation was indicated in this case.
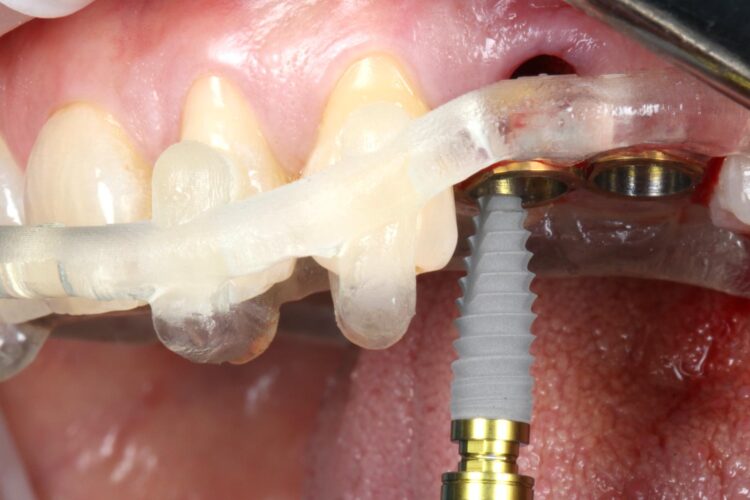
Figure 7a: Fully guided implant placement

Figure 7b: Fully guided implant placement
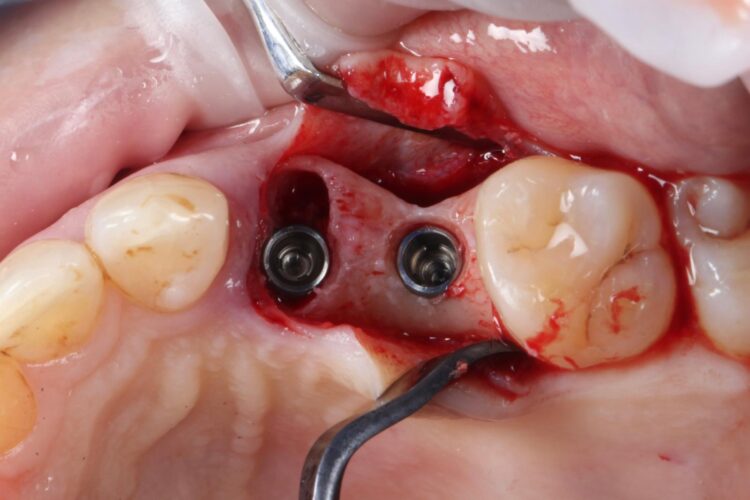
Figure 8: Implants placed in palatal root
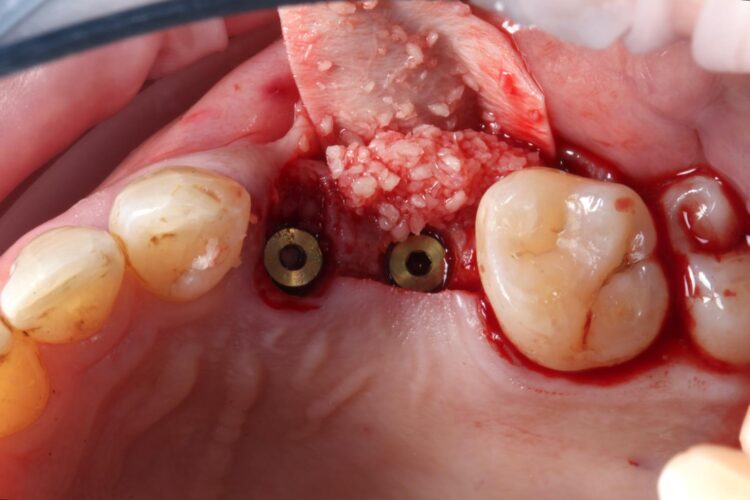
Figure 9: Contour augmentation UL5 and jump gap grafting UL4
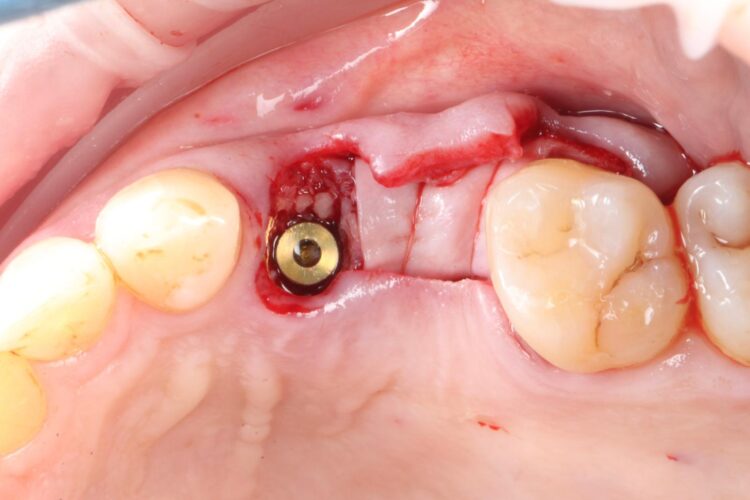
Figure 10: Periosteal suture stabilisation of graft
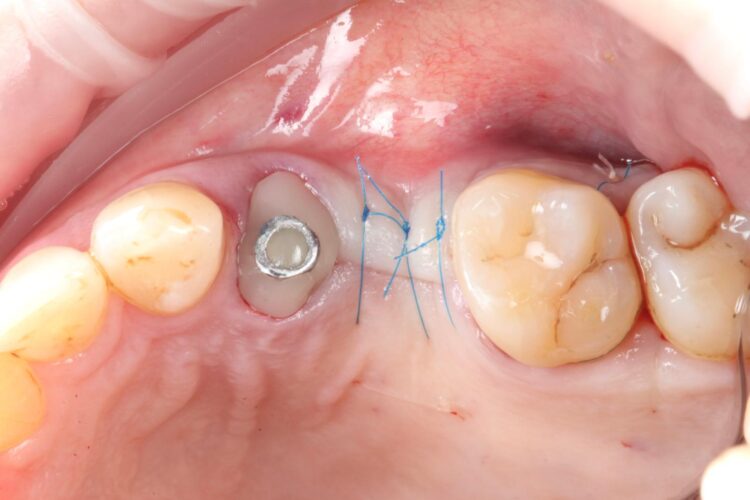
Figure 11: Passive tension-free closure obtained
Another predetermined concern was the amount of remaining bone surrounding an implant after placement. There was less than 2mm of residual bone buccal to the UL5 site once the implant was placed. Alberto Monje et al. (2023) [v] showed that thin buccal bone at the implant site increases the risk of major dimensional changes, this can have direct implications on the aesthetics and functional outcomes.
Consequently, the bone was contour-augmented, using MinerOss® Blend (BioHorizons Camlog), which provides a good combination of cortical and cancellous bone for efficient bone turnover and also maintains graft stability in the healing phase. The graft was held in place with a collagen membrane stabilised using resorbable sutures. The custom healing abutment is then placed and torqued (10Ncm) into the UL4 implant before the wound is approximated and sutured using a non-resorbable 6-0 Prolene suture.
An x-ray was taken immediately post-operatively to confirm that the temporary cylinder was seated correctly and wasn’t catching on the socket walls. This image also provided a reference for the custom healing abutment position and ensured that the bone graft material added to the jump gaps wasn’t preventing this abutment from fully seating.
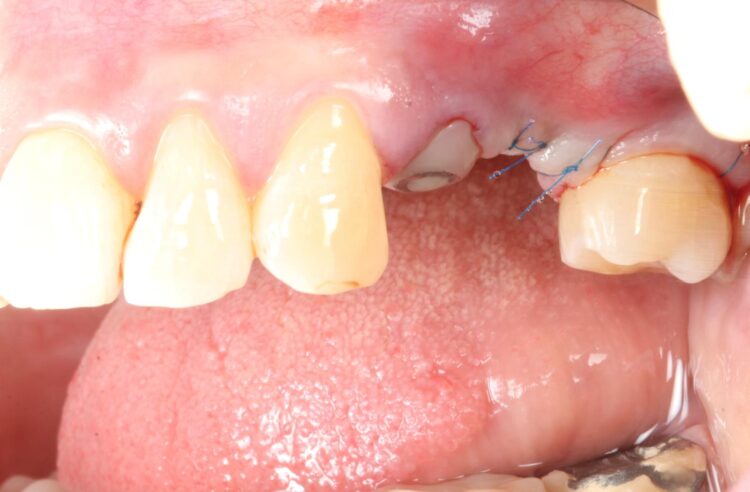
Figure 12: Custom healer in UL4 site
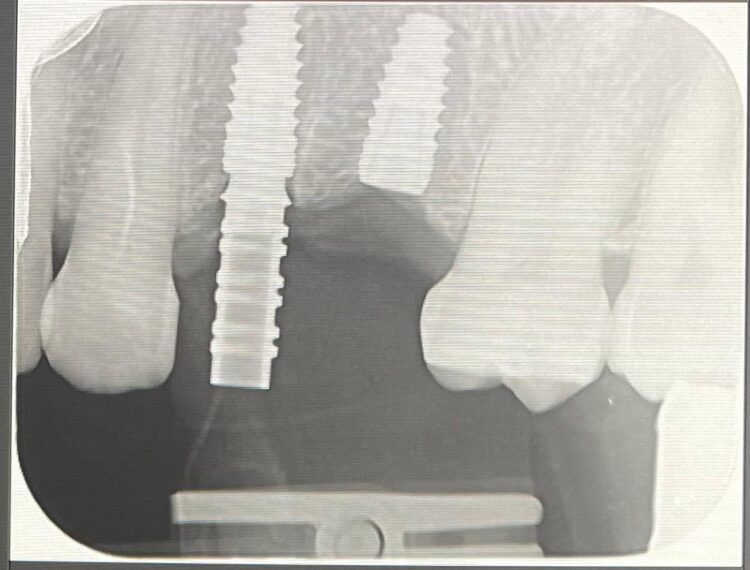
Figure 13: Temp cylinder in situ
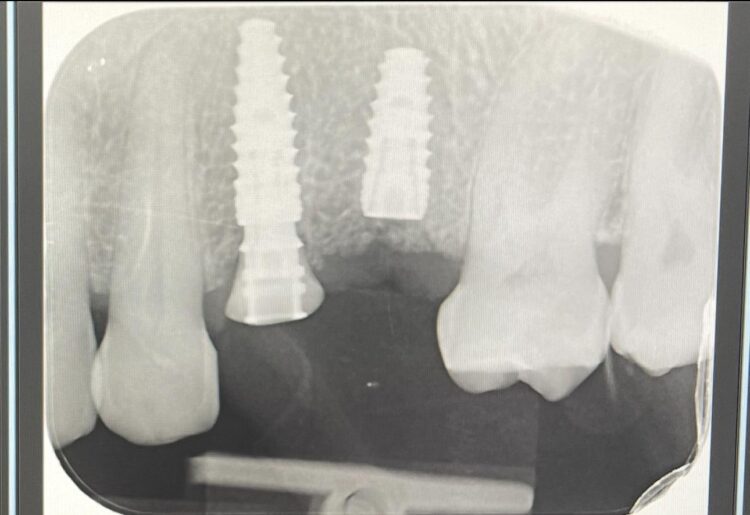
Figure 14: Custom healing abutment in situ
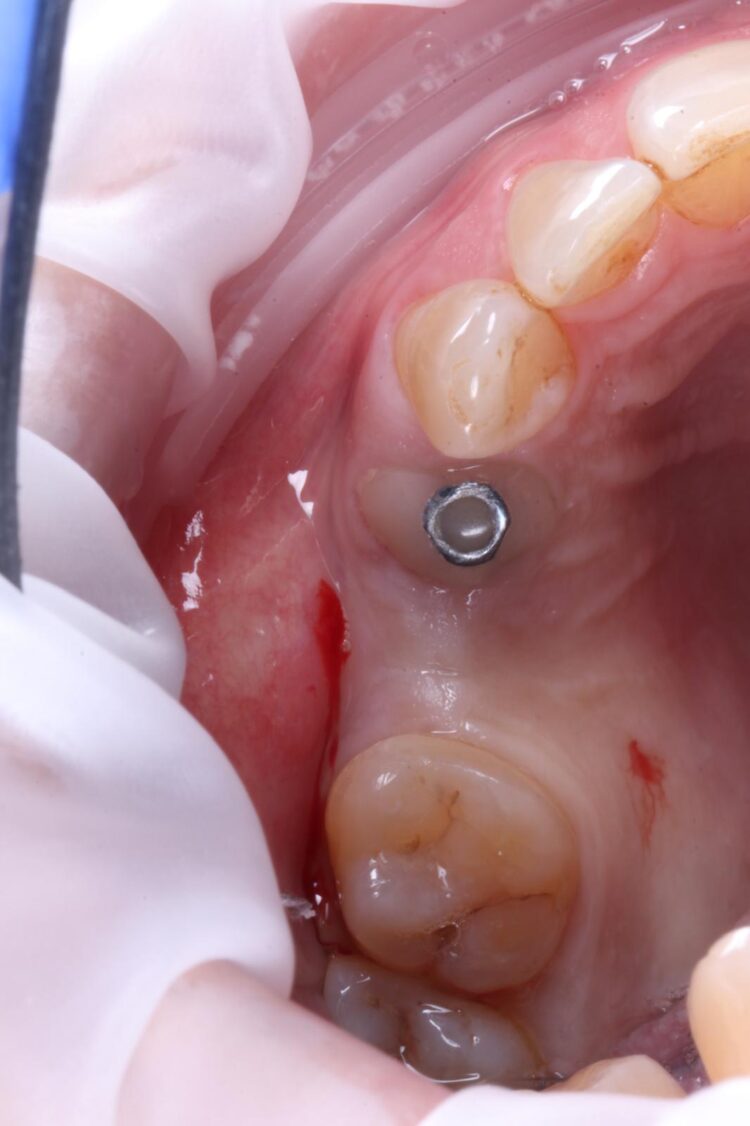
Figure 15: Three months after implant placement and GBR
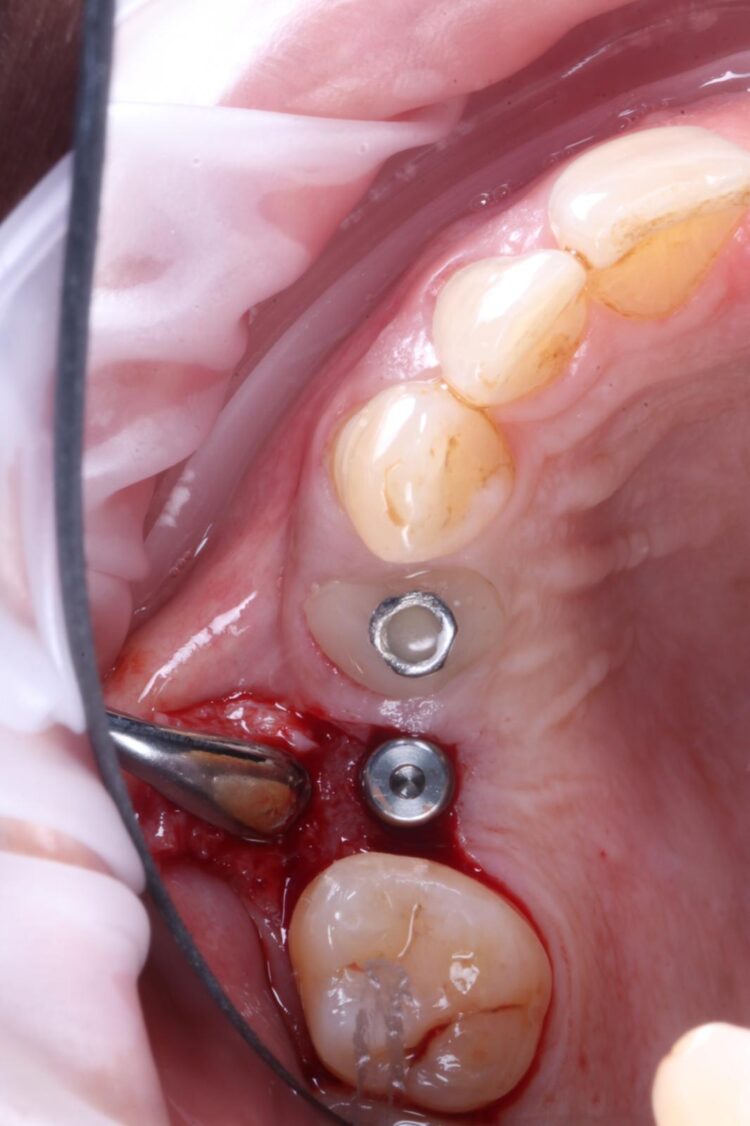
Figure 16: Uncovered UL5 implant, new buccal bone at least 2mm in width
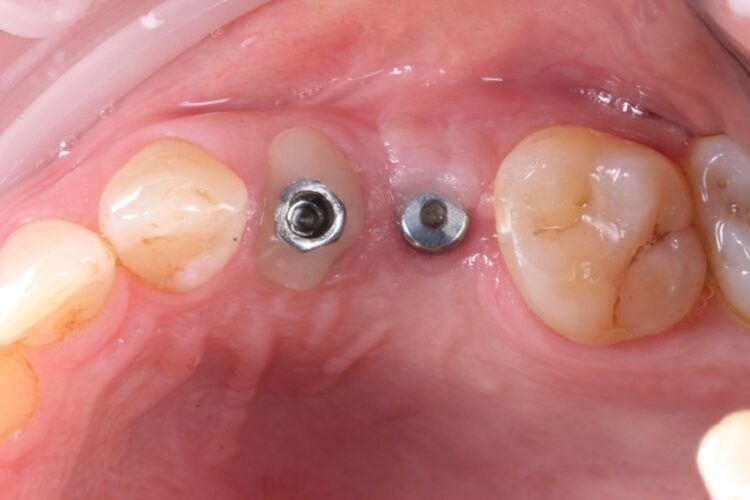
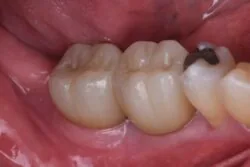
Figure 17: Day of crown fitting
Review and reflections
The implant in the UL5 was uncovered 3 months later to reveal healthy tissues. Three weeks later the final scan was taken (using trios intra-oral scanner) for the fabrication of the definitive crowns. On the day of crown fits both abutments were removed and the crowns seated. Due to the UL4 site having a custom healing abutment, which had been supporting our ideal emergence profile, it was much easier to engage this restoration and seat within the already moulded soft tissues.
One of the main reasons I choose to work with BioHorizons Camlog, aside from the quality of the products, is that the customer service is incredible. I have complete access to the local rep, the regional and area managers when needed.
With regards to the UL5 there was some blanching around the buccal aspect of the crown due to the use of a generic abutment, which does not offer any resemblance to the ideal emergence profile for the final restoration. Regardless good prosthetic positioning had been achieved to allow for screw-retained restorations in both implants. The final restorations were fitted as single unit layered zirconia crowns on titanium bases. The patient was delighted with the results.
Upon reflection of this case, a custom healing abutment may have delivered better soft tissue contouring than the generic abutment on the UL5. Healing may have taken longer, but it would have been easily tolerated by the patient and may have resulted in a better biological result with optimised aesthetics.
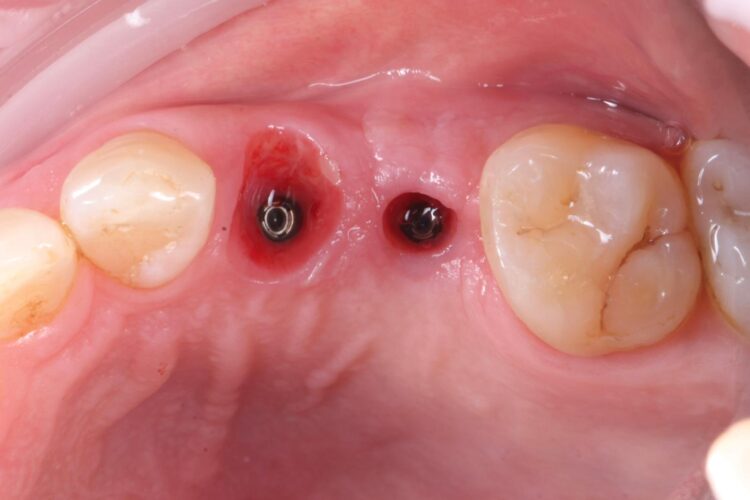
Figure 18: Difference between custom and conventional healer
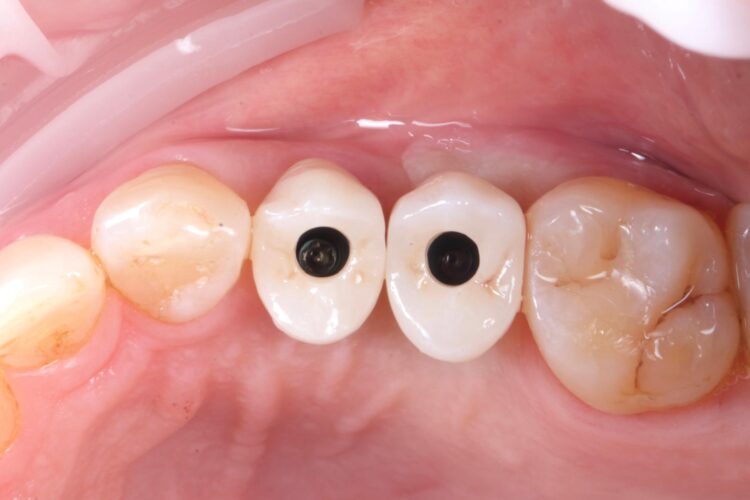
Figure 19: Adjacent to UL5, blanching on buccal tissue
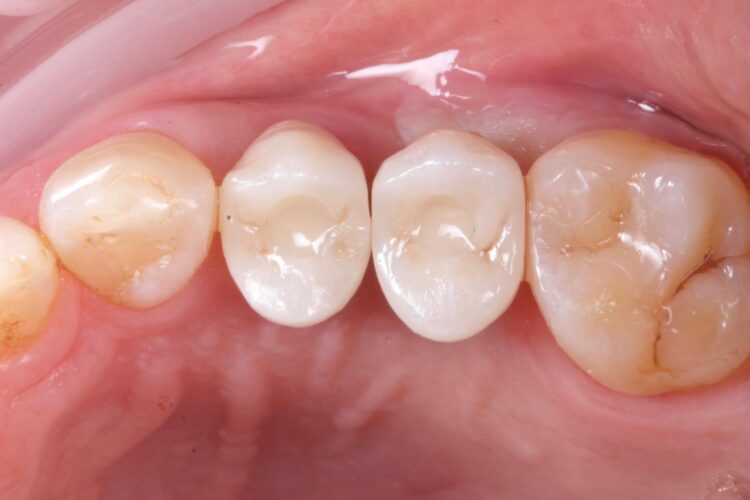
Figure 20: Screw access holes filled
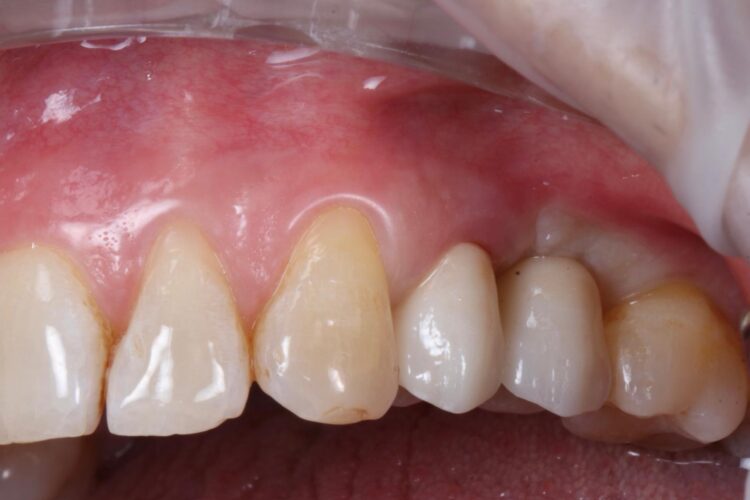
Figure 21: Layered zirconia crowns on ti bases
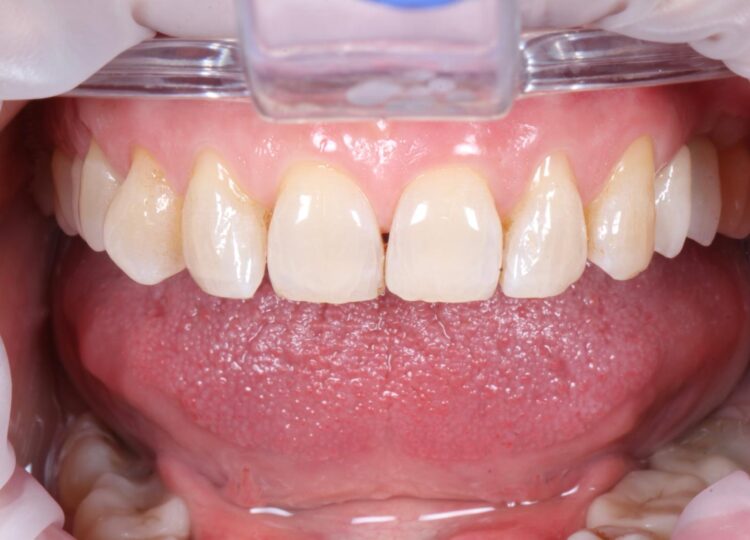
Figure 22: Anterior view of the crowns in situ
With regards to the products selected, the CONELOG® Progressive implant 3.8mm is my go-to for premolar sites. The implant is versatile in its clinical application, suitable for use in healed ridges and fresh sockets, providing good stability for delayed and immediate implant placement protocols. It’s an all-in-one implant for me and I love using it. The implant connection is also great – you almost get a cold weld on the conical connection, which affords confidence that custom healing abutments will remain stable during the healing phase.
One of the main reasons I choose to work with BioHorizons Camlog, aside from the quality of the products, is that the customer service is incredible. I have complete access to the local rep, the regional and area managers when needed. There is also a great community and network of clinicians using their products, which allows me to discuss cases with friends and colleagues.
To discuss how you can implement the CONELOG® Progressive implant into your implant practice contact our team.
For all your implant educational needs, visit our dedicated education website where you can find a range of courses to suit you.
*Article originally published in May issue of The Dentist magazine.